Here, we are sharing with you various ways through which you can take screenshots in Windows 11 to meet your needs. This ranges from the fast and simple snipping tool to the complex snip & sketch application that enables you to meet your screenshot needs swiftly.
That is why you need to learn what could be used to maximize these screenshot tools for better productivity, and creativity and how to interrelate with the Windows 11 gadgets.
7 Steps To Screenshot On Windows 11
Below are seven simple steps to take screenshots on Windows 11:
1. Using The Print Screen (PrtScn) Key
Step 1:Find out the position of the ‘PrtScn’ button on your keyboard. It is often available at the top right corner of your keyboard by the function key buttons.
Step 2:Press the ‘PrtScn’ key. It is done to take a screenshot of the entire screen. And it gets stored as the image on the clipboard.
Step 3: To view the screenshot, run an application like ‘Paint’, ‘Word’ or ‘Email’. Then to paste the image, press ‘Ctrl + V’.
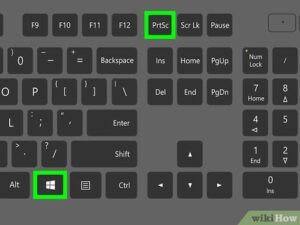
2. Using Windows + Print Screen (PrtScn)
Step 1:In this window, press the ‘Windows key + PrtScn at the same time.
Step 2: There will also be a pop-up message whenever a screenshot has been taken by the computer.
Step 3:The captured screenshot will be easily saved in a folder Pictures > Screenshots on the computer operating system.
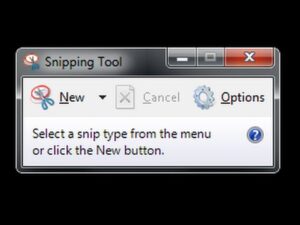
3. Using The Snipping Tool
Step 1:Click on the search bar and type ‘Snipping Tool’. Select it from the returned results.
Step 2:On the Snipping Tool window, there is a button ‘New’. Click on this to make a screenshot.
Step 3:Choose from the given types of snips: rectangular, free form, window, and full-screen snip.
Step 4:Select the part of the scene you want to capture along with other settings necessary to complete a shot. After the shot is done, the picture taken will be displayed in the new Snipping Tool window with which the new Snipping Tool is designed.
Step 5:If you need to label something, don’t worry; you can use the pen tool to edit the screenshot as you desire. If not, check at the top of the page for ‘File’ and then click ‘Save As’.
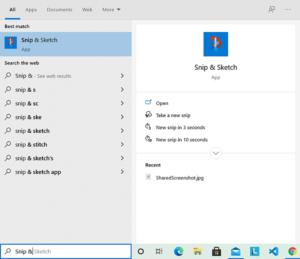
4. Using Snip & Sketch
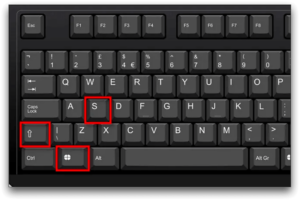
Step 1: To open Snip & Sketch, use the Windows key + Shift + S which will produce a shadow around the screen.
Step 2:The screen will go a bit gray and in the center of the screen there will be a bar with Rectangle, Freeform, Window, and Full-Screen icons.
Step 3: Choose the type of clipping that you would wish to make then click on the area that you wish to crop.
Step 4:The screenshot will be copied to the clipboard and then a notification will appear and can redirect you to Snip & Sketch for further editing.
Step 5:Interestingly, Snip & Sketch is enhanced with tools for annotation, cropping, and saving a screenshot directly.
5. Using the Xbox Game Bar
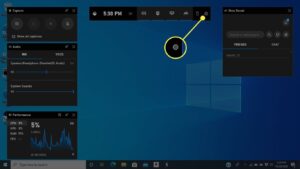
Step 1:To open the Xbox Game Bar press ‘Windows key + G’.
Step 2:If – you are asked – click ‘Yes’, this is a game to turn on the screenshot (despite the fact that you do not have to play).
Step 3: The Camera Icon on the overlay can also be clicked or the ‘Windows key + Alt + PrtScn’ to capture the screenshot.
Step 4:This capture will be saved in the folder Videos > Captures.
6. Using the Windows + Shift + S Shortcut
Step 1: Hold down the windows key and then press the shift key along with the S key and then right-click.
Step 2:She pointed out that the screen would dim, and a bar with four choices: Rectangular Snip, Free Form Snip, Window Snip, and Full-Screen Snip would appear.
Step 3:Select a snip type of choice and then apply a mouse click and drag to capture the targeted area.
Step 4: Once a screenshot is captured, it is automatically stored in the clipboard, and can be pasted in any application (Word, Paint, Email, and so on- Ctrl + V).

7. Using Third-Party Tools
Step 1:Install software to capture screenshots such as Light, Green Shot, or Share X.
Step 2:To use it just open the tool and set it up by the parameters that you require.
Step 3:Right-click and click on capture at will, or hotkeys control + shift + 0 to 9 to capture the screen. Most of these tools come with enhanced features like recording actions on a computer’s screen and rich annotation features.
Step 4:By using the 3rd party tool, the screenshot is automatically saved, shared, or can be edited based on the options provided.


